


Roman Roads
The Roman roads in Britain
There is no doubt that one of the greatest achievements the Romans brought to Britain was the construction of the network of roads that rang throughout the whole country. Before the Romans, the roads were just dirt tracks with mounds and potholes that injured unsuspecting travelers and broke many a cart.
|
|
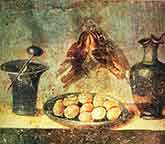
Then after 43 Ad, that all changed. As the Romans went forward and deeper in England, they established towns and regional capitals civitas capitals. To join them together, they embarked on a massive programme of road building as they had done in Europe. In total there were over 53,000 miles (85,000 kms) of road in Britain and the continent.The new roads enable troops and equipment to be moved great distance in a fraction of the time it would normally take. Trade benefited by the introduction of the roads by giving merchants the ability to move goods between towns much faster and easier and with less risk of damage to their goods. Fresh fruit and vegetables were moved around from the agriculturally rich lands in the south and sold in the north where conditions for farming were less favourable. The produce arrived fresher, and so meant that a better price could be bargained.
The construction of a road
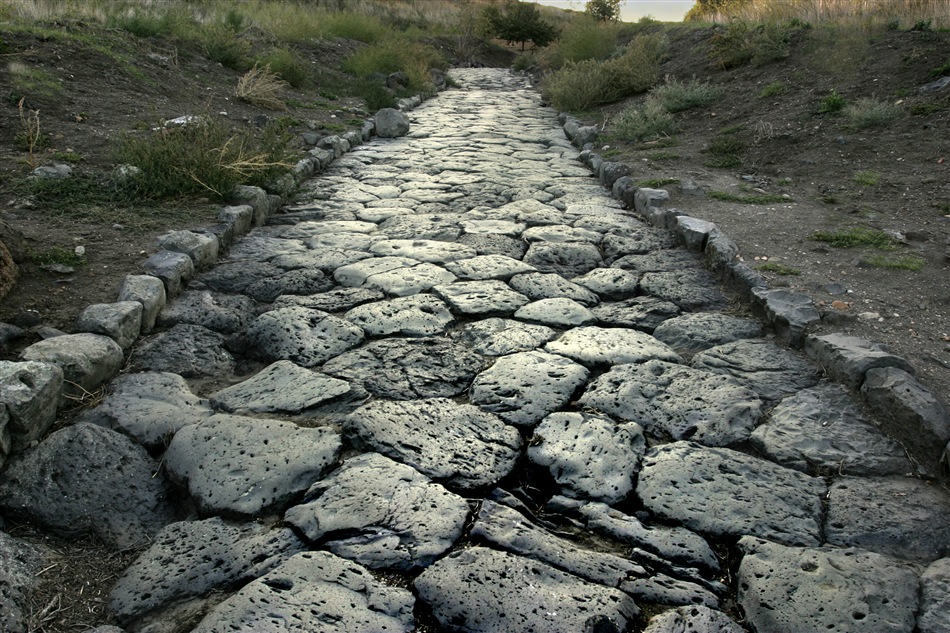
As with all Roman design, the fundamentals were thought out to ensure the maximum benefit from the construction process. The reason the Roman roads were so strong, was due to the foundations that were laid and the techniques used in the design. Apart from natural undulations in the roads, they were mainly built in an absolutely straight line between two points.
The roads passed around obstacles such as hills, to avoid the extra effort needed by heavy wagons to negotiate the rise. It was mostly on a high point of ground that a junction was built, which was used by the surveyors to make the viewing of the road easier and to ensure that it was built as straight as possible.

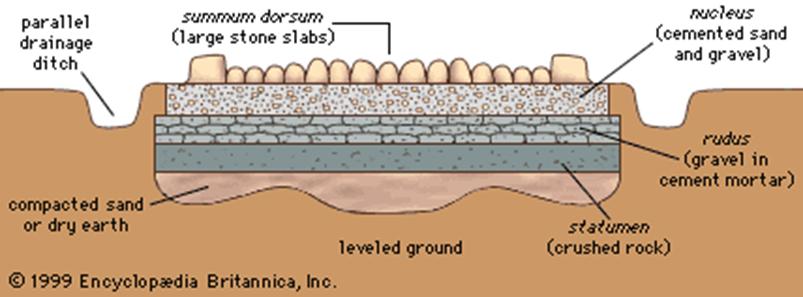
The process of building a road was divided into four actions
- Firstly a ditch about 3 ft (1 metre) deep was excavated.
- The was filled with large stones that were packed as compactly as possible to avoid movement and so lessen the risk of the road sinking over time.
- Over this a layer of smaller stones was laid and this was bound by cement that just covered the stones.
- The final layer was made up of gravel, or small pieces of flint that was compressed as tightly as possible.
If local materials, such as slag from local mines was available, then this too was added to give extra strength.
Working from the middle of the road outwards:
- There was the road itself which was cambered so that the centre was about 1 ft (30 cms) above the sides. This allowed the drainage of rainwater to wash away the buildup of deposits that formed over the surface over time.
- The agger was on each side of the road and was a flat surface between 30-40 ft (12-15 metres) wide.
- At the edge of the agger was the drainage ditch that collected the excess water and moved it further along the length of the road.
- Then further outwards was the Zone limit ditch which defined where the road ended. This also served as a marker for the construction teams to indicate where they were to fell any trees and uproot bushes within this zone. In Roman times, highway robbers who preyed on unsuspecting traveler were common, and this extra ditch was mainly to protect anyone using the road from a surprise attack from the undergrowth.
An experiment
The Romans were noted for their straight roads that hardly deviated in course from one town to another no matter how far apart they were.
The next time you are out in the open in you home town or village, or wherever you live, find a wide open space and think of a town that is about 100 miles (160km) away. Now face in the exact direction of that town and ask yourself how you would build a road without using any detailed maps, or satellite images, or modern day electronic devices. Oh yes. The road must as straight without much variation in course between where you are now and the other town. You probably had trouble finding the exact direction to face in, let alone how to go about plotting it's course.
So, why can't you do it? The Romans did.
Plotting the course of a road
Starting with the big picture<
Of course, you couldn't do it because you were working alone. Today it takes teams of surveyors working together to plot the course of a road. So it was in Roman times and they used instruments that are the forerunners of the tools surveyors use today.
The amazing part of all this is that the Roman road system was very much the same throughout the whole empire. But not one instruction book has ever been found that gives details of how it was done. All we have to go on are the documents kept by individuals and Roman writers of the time. There is a clue in that Roman roads were not exactly straight over their entire length. But the straightest parts are in long sections. This leads us to believe that they went across a straight route allowing the inaccuracies to build up until they reached a point where slight changes in direction was necessary.. This would account for there consistently being many miles of straight sections, then a slight bend, followed by more miles of straight road.
As the Romans were superb engineers, they found a solution that was both simple in it's principle, but also intricate in it's detail. As with any project, you start off with the overall view and gradually work it down through a series of stages until you reach the lowest level. So it was with the Roman roads.
Marking the course of the road
The Celts had worn tracks from place to place over the years, so the Romans had a rough idea in which direction they were going. Many of the roads were already there in a very crude form. But these tracks had been made by accident by people walking along them, so they weaved around all over the place. Definitely not the Roman way.
When a decision had been made to build a road between two towns, teams of surveyors would set out along the route. They would head for patches of high ground and set up markers on hilltops and in open terrain where it was generally flat, such as the Anglian region of the Iceni and Trinovates.
Once they had completed this task, and there could be over a hundred of these markers between the two towns, then they would begin the task of ensuring these markers were in as straight a line as possible.
For this they used a groma, a very simple yet effective device for measuring the straightness of a line between a point where the observer was standing and a point some distance away on either side.
The groma
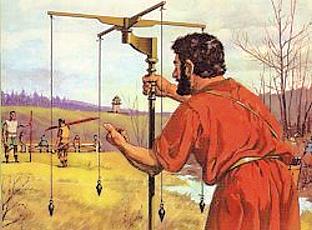 The groma was a horizontal wooden cross mounted on a stand that had a curved shaft running from this cross to a platform at the bottom. hanging from the end of each arm of the cross was a plumb line. This was just a string with a weight at the bottom. The reason for the curved shaft was so that the surveyor could sight across two opposite plumb lines without having an obstruction if the way. Of course, this could only be used in calm conditions so that the vertical lines would stay steady. In the not so settled conditions of Britain, they may have used a version where the plumb line was replaced up a nail pointing upwards as a sight. The cross at the top may have been rotatable with a disk underneath marked in degrees. Don't worry, all will come clear later.
Using the groma
The surveyor would place the groma on the one high point and line up both plumb lines so that they were both in line with one of the markers.
He would then go around to the other side and, without moving the groma, he would sight up the two plumb lines with the other marker. If he can see all three components are in line, then he knows the three points are also in line. If not, he could rotate the cross until the lines and the far marker lined up and read off the number of degrees deviation from the plate.
Back to the office
Once all the measurement had been taken, they would all head back to the office and transfer the readings onto one long sheet of paper, marking each point taking into account any deviation from the ones one either side. Once this had been done and all the points had been joined, the whole finished article was fixed to a wall and the surveyors could stand back and see the whole course of the road from start to finish. From this they could see which markers needed to be moved to make the road as straight as possible.
Making adjustments
When all the rogue markers had been re-sighted and the calculations remade and the map updated, the road was now showing sections of straight road with slight deviations where a change of course was necessary. A change of course would, for example, happen where the road was to cross a river and the Romans wanted to make the bridge at the narrowest point.
Marking the actual course of the road
Once the course of the road was decided, the next task was for the course of the road between each marker to be established.
The surveyor would then return to a marker with two assistants. One would stake out the route, the other signalled instructions to the first assistant. The surveyor would sight up the groma again between the current point and the far marker. He would then send the second assistant out with a set of poles. He would walk out about a hundred yards (100m) and stop to face the surveyor.
The surveyor would sight up the plumb lines with this assistant. He then issued commands to the other assistant standing next to him. The signaller would raise either his left or right arm depending on with way the assistant with the poles was to move to be in line. Once he was in line, the surveyor would give the O.K. and the signaller would raise both arms in the air as a sign for a pole to be planted in the ground. After securing the pole firmly, he would walk back a further hundred yards for the process to be repeated.
This whole procedure was repeated until there were a line of poles between the each main marker to guide the road building team.
Measuring and marking the road
One the road had been built, they Romans wanted to know how long it was. The idea of doing this was not only to aid the traveller, but also to enable them to work out the sizes of estates for tax purposes.
You must have seen him. The workman in his bright orange jacket walking along the road side with, what looks like, a wheel on the end of a stick. Actually, he has an odometer, which is used for measuring the distance between two points.
In Roman times, exactly the same type of instrument was used. Although, this was not quite the pocket sized version seen today. It was also known as an 'odometer'. From 'hodos' and 'metron', the Greek words for 'way' and 'measure'. Literally, 'measure the way'.
The Roman odometer
Like most Roman machines, the odometer was an ingenious device. The principle of it's operation was simple, the execution clever.
The device was actually one wheel of a cart that was linked to a series of gears with each wheel in the gear system turning slower than the previous. As the final gear turned, it would release a pebble from a chamber and drop it through a hole into a box.
When the cart left a town, the device was arranged so that one pebble dropped after each mile of travel. On arrival at the destination, the worker would take the stones from the box and count them. The number of stones removed equalled the number of miles travelled. The Roman mile was shorter than the one we know today.
Marking the road with distance signs
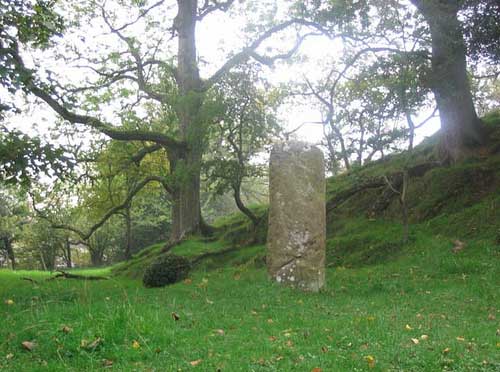
To help travellers during their journeys, the Romans put a milestone along the side of the road. As it's name suggests, these were direction and distance indicators placed at one mile intervals along roads. On this stone was the name and distance in miles of the town to the left, and below this was the same information about the town to the right. One thing archaeologists are thankful for, is the practice of many builders of inscribing their name and the year into the stone. This not only helps in ascertaining the age of the road, it also helps to estimate the year the Romans entered that area of Britain, and so reinforce the knowledge we have of how the Romans moved through the country.
A great video on Roman Road building. The presenter is really good! Anything he does is entertaining.
Maps of the Roman roads in Britain